Previous
Previous Product Image

Stamping Plate 111 - Editor

9,50 €
Next

Plaque 114 - Free Falling

9,50 €
Next Product Image

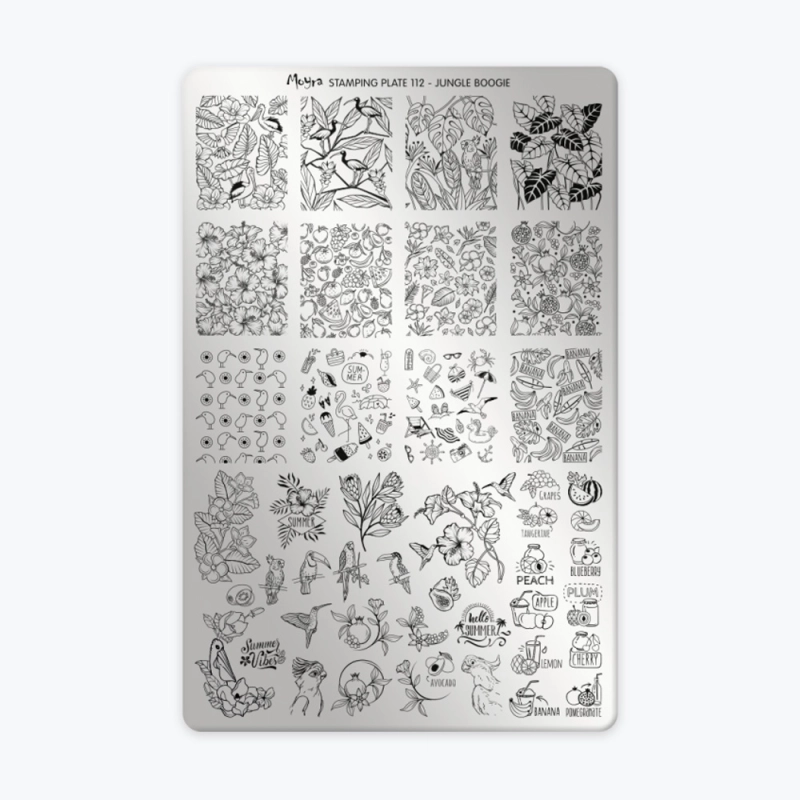
Stamping Plate 112 - Jungle Boogie

9,50 €

⏳ En réapprovisionnement — disponible sous 1 à 2 semaines. Vous pouvez commander maintenant.

Description

Features Dimensions: 14.50 x 9.50 cm Material: Stainless steel Theme: Jungle Boogie, tropical patterns, exotic flowers, and birds Usage and Compatibility The Moyra Stamping Plate 112 - Jungle Boogie is perfect for creating exotic and summery nail art. Its wide variety of tropical birds, lush floral motifs, and summer fruits allow you to design the ultimate manicure for holidays, summer vibes, or festive events. Suitable for both beginners and professionals, this plate is used with stamping polish and a stamper to achieve precise, vibrant results. Check the "Protocol" tab for more details.
Protocol:
How to use stamping plates                  
-Remove the blue protective film from the plate.
-Degrease the plate with Cleaner.
-Ensure your gel or gel polish application is properly applied and cured.
-Apply a matte top coat over your color.
-Apply stamping polish to the chosen design.
-Scrape the polish with a quick and precise motion using a scraper tilted at 45°.
-Quickly position your stamper over the design, pressing lightly to transfer the image onto the stamper.
-Position the stamper over the nail and check the alignment.
-Gently press the stamper onto the nail to transfer the design.
-Apply a top coat and cure for 2 minutes under a UV-LED lamp.  
Utilisation des plaques de stamping                  
-Retirez le film plastique bleu de la plaque.
-Dégraissez votre plaque avec le Cleaner.
-Assurez-vous que votre pose au gel ou au vernis semi permanent soit bien appliquée et polymérisée.
-Appliquez une finition matte sur votre couleur.
-Appliquez le vernis sur le motif choisi.
-Raclez d'un geste délicat et précis le vernis à l'aide d’une raclette incliné à 45°.
-Positionnez rapidement votre tampon de stamping sur le motif en appuyant légèrement pour bien transférer l’image sur le tampon.
-Positionnez le tampon sur l'ongle et vérifiez que le motif est bien positionné.
-Pressez délicatement le tampon sur l’ongle pour transférer le motif.
-Appliquez une finition et polymérisez 2 minutes sous lampe UV-LED.  

Shopping cart

0
image/svg+xml

No products in the cart.

Continue Shopping
⏳

Produit en réapprovisionnement

Cet article est actuellement en réapprovisionnement. Délai estimé : 1 à 2 semaines.
Votre commande sera expédiée dès réception du stock.