


Description
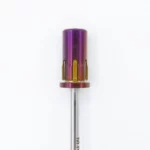
Specifications Dimensions: 25.4 mm Shank Usage and Compatibility The Mini Sanding Band Mandrel - E2 is perfect for refining artificial material near the natural nail, smoothing transitions on nail tips or Popits, and meticulous natural nail preparation during manicures. Its compact size allows for high-precision work, which is essential for reaching hard-to-access areas. It is compatible with professional electric nail drills, ensuring a stable fit for sanding bands and a smooth, fluid performance. Check the "Protocol" tab for more details.Protocol:
Using the Mini Sanding Band Mandrel - E2
- Select a mini sanding band suitable for the surface you are working on.
- Slide a new sanding band onto the mandrel.
- Unlock the safety ring on the nail drill handpiece.
- Insert the mandrel without pushing it all the way to the bottom.
- Lock the safety ring.
- Adjust the drill's rotation speed according to the task at hand.
- Work with moderate pressure and at a precise angle to prevent any overheating.
- Once finished, unlock the safety ring and remove the bit.
- Remove the used sanding band and discard it immediately.
- Sanding bands are single-use only and must be replaced after every client to guarantee optimal hygiene.
Maintenance and Recommendations
To maintain the bit’s efficiency, we recommend using a Nylon Brush to remove any embedded dust or material.
The electric nail drill must be completely stopped before changing the rotation direction.
If the bit breaks inside the handpiece, it can be extracted using a powerful magnet after unlocking the safety ring.
Online Training
To master the nail drill and use your bits to perfection, we recommend our dedicated online training courses at www.mnails.tv.


